
In case you have a Mac, "how to backup iPhone to Mac" tutorial is one of the cleverest ideas to ensure that your data stays safe while at the same tim
In case you have a Mac, “how to backup iPhone to Mac” tutorial is one of the cleverest ideas to ensure that your data stays safe while at the same time not having to rely on iCloud storage. With this method, the whole iPhone is copied – in fact, the backup contains pictures, messages, contacts, and even the iPhone settings.
The method is very quick, secure, and does not require the use of a wireless network or cloud space. If you are to get a new iPhone, update your software, or simply want to have some security, the backup via your Mac is like a guarantee that everything will remain safe and, thus, can be restored without any hassle at any time.
Why You Should Backup Your iPhone
The iPhone you own is similar to the diary of your life — photos, conversations, memos, and the rest of the stuff which is of great value to you are all kept in it. Therefore, doing the backup is nothing else but a rescue operation of those invaluable memories in case your device vanishes, is taken, or smashed.
Currently, regularly doing iPhone backups may be advantageous to you in several ways like:
- It is making it feasible to re-establish the whole data when the new iPhone is bought
- Recovering from a condition where loss or damage has been done unintentionally
- Having the ability to safeguard the pictures of your family or the phone numbers that you have saved in your contacts
Benefits of Regular iPhone Backups:
Restore all your data when you switch to a new iPhone
Recover files after accidental deletion or loss
Keep your photos and contacts safe from damage or theft
Save important app data and settings for easy recovery
Imagine your iPhone surrounded by glowing icons (photos, messages, music, contacts), each connected by a safety net labeled “Backup.”
How to Backup iPhone Using iCloud? (Easiest Method)
If you want a wireless and automatic backup solution, iCloud is your best option. Apple provides every user with 5 GB of free cloud storage, which can be expanded with paid plans if needed.
Steps to Backup iPhone via iCloud
Connect your iPhone to a Wi-Fi network.
Go to Settings → [Your Name] → iCloud → iCloud Backup.
Turn on Back Up This iPhone.
Tap Back Up Now.
Keep your phone connected to Wi-Fi until the process finishes.
Once enabled, iCloud automatically backs up your iPhone every day when it’s charging and on Wi-Fi.
A simple visual showing an iPhone connected wirelessly to a cloud with arrows transferring photos, messages, and settings upward.
Pros
No computer or cable required
Automatic daily backups
Accessible from anywhere
Cons
Limited to 5 GB free storage
Slower for large media files
Requires Wi-Fi and Apple ID login
Pro Tip:
Use iCloud selectively by backing up only essential apps (like Photos, Contacts, and Messages). Go to Settings → iCloud → Manage Storage → Backups and toggle off non-essential apps.
How to Backup iPhone to Mac? (Finder Method)
For Mac users, Apple replaced iTunes with Finder (macOS Catalina or later). This method stores a complete backup on your computer.
Steps to Backup iPhone to Mac
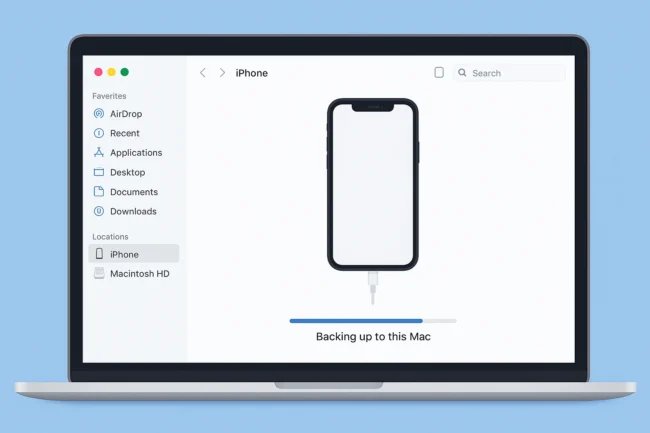
Plug your iPhone into your Mac using a Lightning cable.
Open Finder and look under the Locations sidebar for your iPhone.
Select your iPhone and click the General tab.
Choose Back up all of the data on your iPhone to this Mac.
(Optional) Check Encrypt local backup if you want to include passwords and Health data.
Click Back Up Now.
Wait for the progress bar to finish. Finder will display “Last backup: [time/date].”
A Mac screen showing Finder with an iPhone connected via cable, a progress bar moving as files transfer.
Pros-
Free, private, and fast backup
Works without internet
Full backup including app data and passwords (if encrypted)
Cons-
Requires Mac storage space
Needs physical connection with cable
Pro Tip:
Encrypting your backup is always better—it saves Wi-Fi passwords, website logins, and Health data securely.
How to Backup iPhone to Computer (Windows or Older macOS Using iTunes)
If you use Windows or an older version of macOS, iTunes is still the go-to backup tool.
Steps to Backup iPhone with iTunes
Install and open iTunes (latest version).
Connect your iPhone via USB.
Click the device icon near the top-left corner.
Go to the Summary section.
Under “Backups,” select This computer.
(Optional) Tick Encrypt local backup.
Click Back Up Now.
You’ll see a progress bar at the top of the iTunes window. Once it finishes, check the timestamp under “Latest Backup.”
A Windows laptop screen showing iTunes with an iPhone connected and a blue progress bar labeled “Backing up to this computer.”
Pros-
Works without Wi-Fi
Full offline control
Can encrypt backups
Cons-
Manual setup each time
Requires iTunes installation
Pro Tip:
To find your backup later, open iTunes → Preferences → Devices. You’ll see all stored backups with their creation dates.
How to Restore iPhone from Backup
When your iPhone is brand new, factory reset, or replaced, restoring from a backup brings your data back just as it was.
Restore via Finder (Mac)
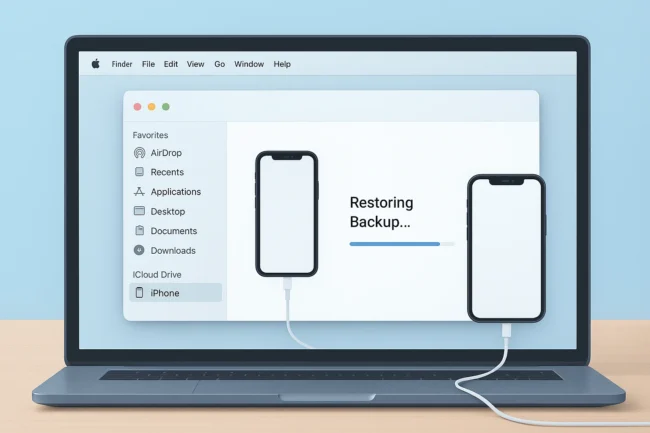
Connect your iPhone to your Mac and open Finder.
Select your iPhone under Locations.
Click Restore Backup…
Choose the correct backup (by date).
Enter the password if it’s encrypted.
Wait until the process completes—don’t unplug the device.
Restore via iTunes (Windows or Older macOS)
Open iTunes and connect your iPhone.
Select your device icon → Summary → Restore Backup…
Choose the backup file → Click Restore.
An iPhone connected to a Mac with a message bubble saying “Restoring Backup: 60% complete,” while a family photo appears on screen.
Pro Tip:
Keep your iPhone connected until the home screen appears. Disconnecting early can corrupt your data restoration.
How to Backup iPhone to External Hard Drive (Pro Method)
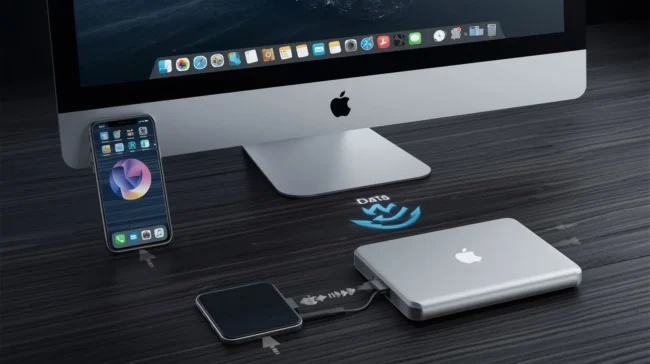
Apple doesn’t directly allow external drives for backups, but you can easily work around it. This is perfect if your Mac’s storage is nearly full.
Method 1: Move Existing Backup to External Drive (Mac)
Steps
Create a backup normally using Finder.
Open Finder → Go → Go to Folder and paste this:
- Copy the Backup folder to your external hard drive.
Rename the original folder to Backup_old.
Open Terminal and run this command (replace
YourDriveName):Finder will now automatically save backups to your external drive.
A Mac connected to both an iPhone and an external hard drive, with arrows showing data flowing from phone → Mac → external drive.
Method 2: Use Third-Party Tools (Optional)
You can use tools like:
AnyTrans
iMazing
Dr.Fone
They allow choosing backup destinations (like external drives or cloud folders), but most are paid apps.
Pros-
Saves Mac storage space
Flexible backup locations
Great for multiple devices
Cons-
Requires setup and external drive access
Some third-party tools are paid
Combine Methods for Best Protection
If you truly want your iPhone data safe, use a multi-layered strategy:
iCloud Backup (Daily): For convenience and automatic safety
Local Backup (Weekly): Finder/iTunes before updates or travel
External Drive Copy (Monthly): For long-term archiving
Three icons (Cloud → Laptop → External Drive) connected by arrows, showing an “all-around protection” system.
This ensures even if one backup fails, another is always available.
Backup Safety Checklist
- Always encrypt local backups
- Test restoring once every few months
- Label external drives (e.g., “iPhone Backup Jan 2025”)
- Keep one backup in cloud, one local
- Avoid renaming or moving backup folders manually
A checklist pad with ticks beside “Encrypt,” “Test Restore,” “Label Drives,” etc., next to an iPhone and USB cable.
Extra Tips: How to Check Your Backups
For iCloud:
Go to Settings → [Your Name] → iCloud → iCloud Backup → Manage Storage → Backups
- For Mac (Finder):
Open Finder → Select iPhone → Manage Backups
For Windows (iTunes):
In iTunes, click Edit → Preferences → Devices to view stored backups.
A Mac and iPhone screen showing a list of backups with dates.
Troubleshooting Common Issues
| Problem | Quick Fix |
|---|---|
| Backup not starting | Restart both devices and reconnect USB/Wi-Fi. |
| iCloud storage full | Delete old backups or upgrade plan. |
| Finder not recognizing iPhone | Trust the computer and update iOS/macOS. |
| Backup too large | Delete unneeded apps or photos before backing up. |
| External drive not saving | Check the symbolic link and reconnect drive. |
Quick Comparison of Backup Methods
| Method | Tool | Internet Needed | Encryption | Best For |
|---|---|---|---|---|
| iCloud | iPhone Settings | Yes | Yes | Automatic daily backups |
| Finder (Mac) | Finder | No | Optional | Full local backups |
| iTunes (PC) | iTunes | No | Optional | Windows users |
| External Drive | Finder/Terminal | No | Yes | Long-term safe storage |
A comparison chart graphic showing icons for each method under headings Cloud, Mac, PC, and Drive.
Summary of What You Have Learned Today
iCloud Backup: The simplest wireless way, but limited storage.
Mac (Finder) Backup: Full control, best for local backups.
Windows (iTunes): Great for PC users.
External Hard Drive: Ideal for extra safety and saving Mac space.
Restore: Bring everything back easily when switching or resetting your iPhone.
Final Thoughts
How to Backup iPhone to mac guide is similar to purchasing a memory insurance policy.
Whichever way you decide to go with iCloud, Mac, PC, or an external drive, the end result is the same — your digital life is secured.
Just do a quick backup today and that will be the last time you’ll have to worry with your phone updating, resetting, or when you get a new one.
A smiling person holding an iPhone, a safety shield icon around it, symbolizing “Data Protected.”
Also Read: The Ultimate Guide to Printing Estimating Software in 2025
COMMENTS